10 Scuba Diving Refresher Tips (+ More Scuba Skills!)
Has it been a while since you’ve last been diving? Don’t worry. We’ll help you get back in the water with some handy scuba diving refresher tips + plenty of scuba skills to improve as a diver!

Looking to get back into the dive game? Have you forgotten some basic dive skills? Don’t know which way is up? Which way is down? Or what’s what anymore? Fear not! We’re here to help.
As a professional scuba diver in Fort Lauderdale, Florida, I come in contact with A LOT of divers looking for a refresher. Folks who went diving once in the Caribbean and are now looking for some fun in South Florida; people who got certified in a quarry in the Midwest and now want a true ocean experience; or simply want a touch up on some skills they learned a few years back.
Whatever the case may be, we got you covered!
- Dive Gear Checklist
- How to Set Up Your Dive Gear
- Scuba Signal Review
- Ensuring You’re Weighted Properly
- The Dive Buddy Check
- How to Enter the Water
- How to Equalize
- Crucial Underwater Dive Skills
- The Safety Stop
- Take a PADI Refresher Course
We’ve ordered these scuba diving refresher tips in unison on how you would go about a dive from the moment you left your house until the end of your dive.
Simply click on one of the scuba diving refresher tips above or scroll down to dive into the ENTIRE guide below.

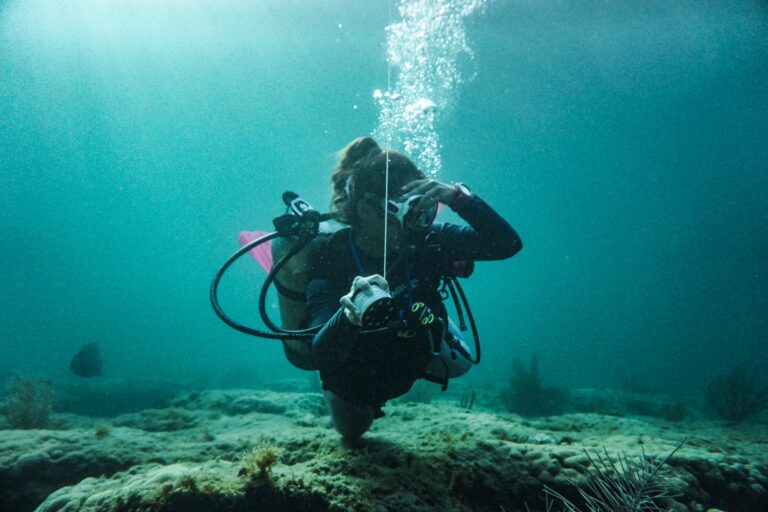
1. Dive Gear Checklist
The gear is what separates the swimmers from the divers. Do you wanna be a swimmer? Or do you wanna be a diver? A diver, of course!
However, if you’re just trying to get back into the dive game, you may have forgotten a few things. Well, let’s refresh that memory of yours on the dive gear you need for scuba diving!
🤿 NEW TO DIVING? Check out our list of Best Scuba Gear for Beginners to find out what works well when you’re just starting out.
Dive Mask
How were you planning on seeing underwater anyway? Dive masks allow our eyes to take in all the beauty the marine world has to offer!

OUR RECOMMENDATION: Aqualung Favola Mask
Snorkel
Along with the mask, a snorkel is highly personable and an essential piece of gear for diving. Its best function is for saving the air in your tank before a dive (think waiting for a dive buddy to enter the water or a long surface swim).

OUR RECOMMENDATION: Aqualung Impulse 3 Snorkel
Fins
Fins allow you to do your best fish impression underwater. They control your movements while propelling you forward and helping your body to a neutrally buoyant position.

OUR RECOMMENDATION: Aqua Lung Express Fins
Wetsuit/ Thermal Protection
A wetsuit can easily make or break a dive. If you’re diving in cold conditions without a thick enough wetsuit, it can be absolutely miserable.

OUR RECOMMENDATION: Aqua Lung 3mm Women’s Wetsuit and Men’s Wetsuit
Buoyancy Compensator Device (BCD)
The vest thingy you wear while diving – your BCD is what controls your buoyancy underwater and on the surface. Fill it with air and adjust accordingly to achieve neutral buoyancy while diving!

OUR RECOMMENDATION: Aqua Lung Pro HD BCD
Dive Computer
Dive computers are an essential component of your dive gear setup. While diving, they’ll tell you your time, depth, no deco time, safety stop and much more. If you don’t own one yet, it may be time to change that.

OUR RECOMMENDATION: Aqua Lung i200 Wrist Computer
Regulator, Octopus, and Submersible Pressure Gauge
Your regulator set up consists of a few different pieces: the 1st and 2nd stage. The 1st stage is the hunk of metal that attaches to the tank. It depressurizes the air as it enters the regulator hose.
The octopus (octo) is the yellow hose hanging off of your regulator. It’s your alternate air source in case your primary goes bonkers.
SPG, or submersible pressure gauge, is another essential piece of the dive gear checklist. It tells you how much air you have left in your air tank and serves as an attachment site for dive computers or compasses.

OUR RECOMMENDATION: Aqua Lung Core Regulator, Octopus, and i300c SPG and computer.
Scuba Tank
Unless you’re looking to dive often…like very often, it’s smarter to rent a scuba tank rather than own your own. No maintenance, no storage, just diving.
But if you do decide to go the ownership route, check out our article on how to buy a used scuba tank – it might just save you some money!

Essential Scuba Diving Accessories
Beyond the basic gear listed above, some other accessories are required for successful diving. To name a few:
- An SMB is used for safety purposes when surfacing away from a boat or dive flag.
- A reel is used to attach to said SMB.
- Gear clips are used for just about everything (you can never have enough of these).
- A tank banger is used to get the attention of your easily distracted dive buddy.
- Use a flashlight for low light situations like night diving, wreck exploration, or if you’re curious as to what’s hiding inside the deep crevice.
- Dive knives come in handy to remove marine debris or to cut yourself away from entanglement situations.
READ MORE: Dive Gear Checklist: 23 Items You Can’t Forget for Scuba Diving

2. How to Set Up Your Dive Gear
One of the first things that get lost on divers who haven’t been diving in a while is how to set up your gear.
And that’s totally okay – it’s a tricky thing if you haven’t done it in awhile.
So if you’re a little skeptical on setting up your gear…this section is for you.

Frequently Asked Questions on how to set up your dive gear:
Hook up your BCD to the scuba tank with the air valve opening facing the back of your head.
Your primary and secondary air sources (octo) need to be fitted on the right side of the tank (as if you were sitting in front of the tank). Your SPG and power inflator hose are off to the left.
Newer BCD models have integrated weight pockets (likely a black or grey handle on each side of the vest). You’ll hear the audible ‘click’ after reinserting the weight pocket.
Older BCD models may require a weight belt. The weights either slide into a pocket or slide directly onto the belt itself.
I like to put the top of my BCD about level with the air valve on the tank. If the BCD is any lower, you run the risk of smoking your head on the tank valve (it doesn’t feel good).
On the left so it does not conflict with your regulator.

More tips on how to set your scuba gear up before a dive
- Fasten your BCD tightly to the tank. Otherwise your tank may fall off while diving (not good!). Most tank straps make an audible ‘click’ when securing tightly enough.
- Don’t forget the safety strap on the top of your BCD around the tank valve! This is just in case your tank strap fails and your tank slips out of place.
- Clip, secure, and fasten any pieces of dangling gear. This helps streamline your body underwater and ensures no gear gets entangled or accidentally damages marine life. Best achieved with some gear clips.
- That includes your alternative air source (octo). Oftentimes, I see a lot of yellow hoses dangling about. This is dangerous for a variety reasons.
- In the case of an emergency, it may be hard to find.
- It can become entangled, damage coral, or damage the equipment itself.
3. Scuba Signal Review
With a mouth full of regulator and an ocean surrounding you, it’s a little difficult to speak underwater – that’s why hand signals are so critical.
Before your dive it’s important that you and your buddy review the most vital hand signals. Here are a few we think you should remember:
Important Scuba Signals to Remember
“Okay” on the surface:
This scuba signal is used after you enter the water and need to tell the boat that you’re okay.

“Big Okay” on the surface:
Commonly used when drift diving or if you’ve gained some distance between you or the boat. In the open ocean, it’s hard for the Captain and Mate to see if you’re okay from a distance. The Big Okay sign lets them know you’re not in trouble.

Underwater Okay:
The most universal scuba signals of all: the okay sign. This lets your buddy know you’re safe, sound, and ready to explore! Remember, if you don’t relay the okay back to your buddy, that means you’re not okay!

Out of Air:
Slash your hand across your throat if you’ve somehow run out of air and need to use your buddy’s alternative air source.

Go Back to the Boat
It may look like “help me I’m poor” but it actually means you need to go back to the boat.

I Don’t Know
So when your buddy asks you “where is the boat”, you can reply with this signal…

Turn-around
When doing a stationary dive and you need to turn around and head back to your starting point, give this sign.

Descend
When you’re at the surface and you’re ready to descend. The thumbs up is the opposite, meaning you’re ready to ascend.

Half Full Tank
Notice, not a half empty tank but a half full tank (optimism, ya’ll). The T-sign means you’re at 100 Bar of pressure (or 1,500 PSI).

Buddy Up
Use this signal if you’re splitting into groups or need a buddy underwater. Ideally, if recreational diving, you shouldn’t have to use. But it comes in handy, nonetheless.

4. Ensuring You’re Weighted Properly
Out of all the problems divers tend to face, being weighted properly tops the list. It always happens.
Whether it be underweighted (they can’t sink) or overweighted (they sink like a stone). Or in other words, positively buoyant (underweighted) or negatively buoyant (overweighted).
Our goal is to get you neutrally buoyant – which is easier said than done.
It’s a tricky thing to get right. Even after years of diving and 100s of logged dives later, we are still tinkering with our weight. It’s forever fluctuating.
Weight Calculator for Scuba Diving
And that’s because there’s a variety of factors contributing to how you should be weighted. Consider these when calculating the weight you need:
1. Your Weight and Body Composition
The biggest contributing factor to how much weight you should add for scuba diving is your own weight and body composition. Particularly body fat.
Leaner body compositions tend to sink easier. Conversely, those of us with a more average body type or a higher body fat percentage may need a few extra pounds of lead added.
NOTE: a rule of thumb, albeit I’m not entirely sure I agree with it, is to use 10% of your body weight. I think it tends to overweigh you, but at least you’ll be guaranteed to sink!

2. Exposure Suit
Which pieces of an exposure suit are we talking about? Well, all of them!
- Wetsuit. A thick wetsuit while diving in colder conditions will increase your buoyancy, thus requiring more weight.
- The same goes for your pair of gloves. It may seem trivial, but it adds extra buoyancy.
- Hoods to cover your head while diving. They’re thick. They consist of a lot of material. And they make you float more!
- Booties. If you wear open-heel fins with a set of booties you may need to add an extra pound or two.
Just remember: the thicker the material, the more positively buoyant you’ll be. For example, a 7mm wetsuit will make you float significantly more than a 1mm wetsuit.
Now how does that play out in terms of weight? Again, it’s a rule of thumb, but each additional mm of thickness equates to an extra 1 – 3 pounds of weight needed.
Calculate accordingly!

3. Type of Tank: Steel or aluminum?
Generally speaking, steel tanks are negatively buoyant and can compensate for some of the weight you would otherwise add. Obviously, this will be dependent on the size of the steel tank you use.
Aluminum tanks, on the other hand, will actually become positively buoyant during your dive. This is due to air consumption – you are literally breathing the tank to a lighter weight!
So again, how does this play out? A steel tank cuts down the extra weight you need while an aluminum tank should be calculated as normal.
4. Salt or Freshwater
Humans can be positively buoyant in both salt and freshwater, but they’re certainly more buoyant in salt than fresh. Meaning, it’s easier to float in saltwater than it is freshwater!
This means you need to add more weight to your scuba outfit to sink while diving in saltwater. This is especially important for divers who did their training in a pool, lake, or freshwater quarry before hopping into the ocean for the first time.
How to Know if You’re Weighted Properly
Again, our goal here is to achieve neutral buoyancy. So how do you know if you have it?
How to Conduct a Weight Check Before Your Dive
Preferably, use a tank that’s near empty (about 500 psi or 35 bar):
- Gear up with every piece of equipment you’ll be diving with and enter water that’s too deep to stand in.
- Take a deep breathe in and hold it.
- Position your body vertically in the water and completely deflate your BCD.
- Correctly weighted divers should sink slightly to eye level but not much further.
- If you’re sinking more than that while holding your breathe, you’re over-weighted. If you’re unable to sink at all and your head remains above the surface, you’re underweighted.
- Adjust accordingly and repeat!

How to Conduct a Weight Check After Your Dive
If you’re totally unsure and don’t have the chance to do a weight check before diving, this test is for you. Prior to your dive, make your best guess with a liberal approach to overweighting yourself.
Whilst conducting your safety stop at the end of your dive (3 minutes at 15 feet depth), see if you remain neutrally buoyant with no air in your BCD.
Take a deep breath in, you should rise just a touch. Now exhale, you should sink just a bit. This is right about the weight you should be. If not, adjust accordingly for your next dive!
READ MORE: How Much Weight Do I Need for Scuba Diving?

5. The Dive Buddy Check
Ah. The pre-dive buddy check. Remember? The infamous BWRAF (just one of the many confusing scuba acronyms to remember).
The Dive Buddy Check is used to ensure you and your buddy are ready to go for a safe, and exciting, underwater exploration. Buddies look each other up and down, check all their hoses, air, do-hickeys, and thingy-mcbobbers. No stone is left unturned if you do the Dive Buddy Check properly.
Again, the acronym we like to use as PADI Professionals is BWRAF, meaning:
- BCDs
- Weights
- Releases
- Air
- Final Check (Fins to Face)
Okay, great. How do you remember that? And what do each of those actually mean? How do you apply them?
We like to use the mnemonic, Breathing Water Really Ain’t Fun. It’ll help you remember the acronym, BWRAF, in the first place.
FOR MORE MNEMONICS: The 27 Best Mnemonics for BWRAF
As for applying each letter, follow the 5-step guide below:
1. BCDs
Breathing
After suiting up, check with your buddy that your BCD is in order.
Is the power inflator hose hooked up? Does it inflate? Does it deflate?
2. Weights
Water
A common mistake people make it completely forgetting to insert their weights into their BCD. I’ve certainly done this.
Double check that you have weights, they’re secure, and properly calculated.
3. Releases
Really
That BCD of yours sure does have a lot of releases on it. A big thing is scuba diving is quick release – in the case of an emergency.
Look over your buddy. Have them look over you. Are all your releases quick to unclip and drop if need be? Or will you be fighting tooth and a nail?
4. Air
Ain’t
Working on a dive boat, you’d be amazed how many are about to giant stride into the water without actually having their air on.
Before you go, make sure you and your buddy have your air turned on. All the way on.
Check your pressure gauge, is your tank full?
Additionally, give a few puffs into that regulator of yours. Does it taste like dry compressed air? Now do the same for your alternate air source.
5. Final Check (Fins to Face)
Fun
This is the final stare down. Scan your buddy head to toe, fins to face. Anything abnormal? Are all hoses, clips, loose gear attached and in a streamlined position?

With enough practice, you and your buddy will perfect your BWRAF, pre-dive safety check. However, don’t get complacent. It’s important you do the BWRAF before every dive.
Some of the biggest mistakes made while scuba diving could have been prevented had an adequate BWRAF taken place before you went diving!
Full Breakdown on BWRAF
For a thorough dissection of BWRAF, read our article, BWRAF: What it Means and How to Use It
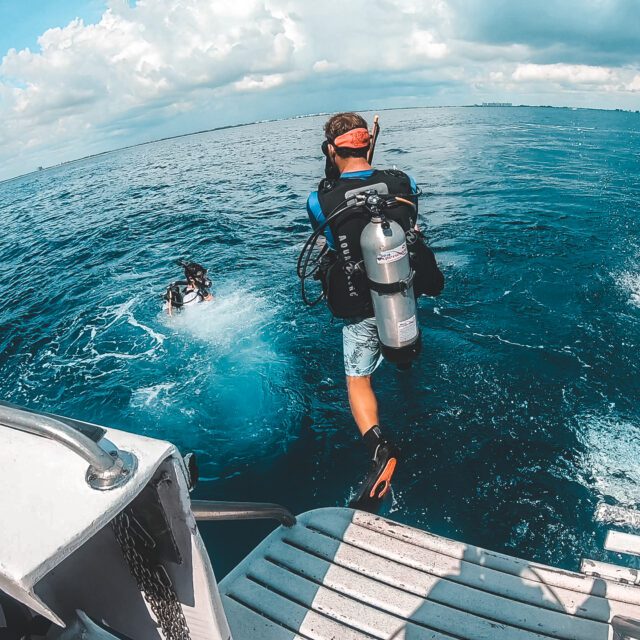
6. How to Enter the Water
When boat diving, there are two ways to enter the water: the giant stride or the back roll. Each serves its purpose in different settings.
Additionally, there’s one more way you can enter the water that you may have not thought of before: a beach entry.
READ MORE: 4 Easiest Methods of Water Entry While Scuba Diving

How to Giant Stride While Scuba Diving
When diving on a boat, the giant stride is the preferred method of water entry.
- Fully equip yourself with all your gear.
- Put a few puffs of air into your BCD using your power inflator hose.
- Shuffle to the edge of the boat where you’ll be entering the water. Usually the bow or stern, depending on the boat.
- Put your real toes on the edge of the boat. Not your fins, but your real toes. The ends of your fins should be dangling off the edge entirely.
- Give your face a high five, holding your mask and regulator (so they don’t fall off after entering the water).
- Look towards the horizon and take a GIANT step off the boat.
- Once you’re in the water and you know you’re fine, give the captain and mate on the boat the big okay.
- Buddy up, descend and enjoy your dive!
Using the Back Roll
The back roll is used when diving on smaller boats – whether it be a six pack charter or a friend’s private vessel. This is because these smaller boats don’t have a dive platform to giant stride from.
- Fully gear up and sit yourself on the gunwale (the side of the boat).
- Scoot your butt to the very edge – the backs of your knees should almost be the only thing holding you onto the boat.
- Hold your mask and regulator with one hand and hold the back of your mask strap with the other (back rolling into the water has a high likelihood of ripping your mask off your face. So secure that sucker).
- Loosen your knee grip on the boat and fling your weight backwards.
- Hit the water with a big splash and give the boat a big okay!
- Dive, dive, dive!
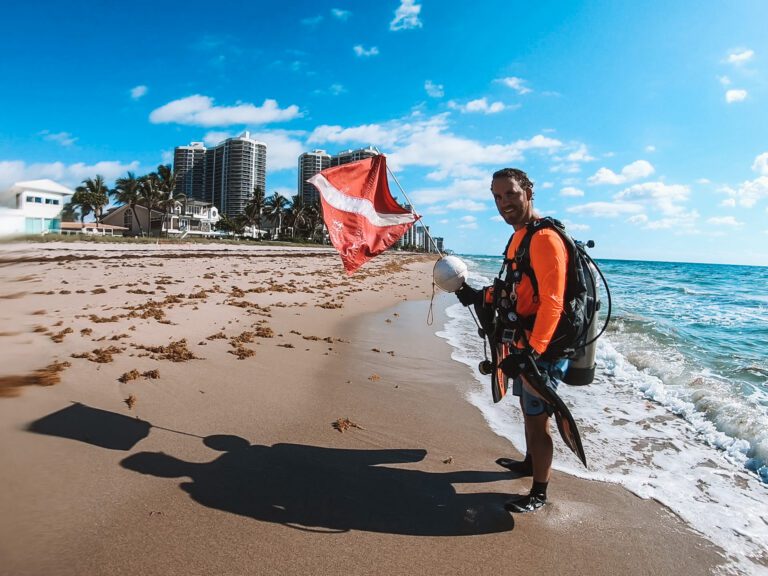
Entering from the Beach
From time to time, beach dives may be riddled with waves. The key is to get through the surf as unscathed as possible (obviously). Easier said than done, right? Here’s how:
- Wade into the water fully geared up with everything except your fins.
- Don’t fully inflate your BCD with air. If you do, a wave may come and literally sweep your balloon-like body away. You need to split through those waves and remaining negatively buoyant is the easiest way.
- When the waves approach and are white capping, turn your body tank first into the waves. This will put enough weight forward to pierce through the waves.
- When you can no longer stand and the waves have ceased breaking, put your fins on and surface swim to your destination!
Of course, it’s much easier if no waves are breaking. We only go shore diving on a calm day with flat seas. A few of our favorite spots are Lauderdale-by-the-Sea and Blue Heron Bridge in South Florida.
READ MORE: 9 Essential Scuba Accessories for Shore Diving

7. How to Equalize While Scuba Diving
Equalizing while scuba diving may be the most critical skill to master. If you can’t relieve the pressure from your ears, you can’t dive. Plain and simple.
Now, why is that? Well, think back to your open water class. The pressure of the water takes a toll on our bodies as we descend. Our lungs are self-regulating as we breathe in and breathe out – they don’t need any help. Our ears and sinuses? Well, that’s a different story.
Ears that are unable to equalize will inevitably go pop! Not good… here are the most popular methods to equalize while scuba diving:

Jaw shift
Moving your jaw from side to side, up and down, or in a circular motion can help equalize your ear as it shifts air to different spaces in your sinuses.
Swallow
Simply swallowing works for some. Air shifts around and the pressure is alleviated.
Nose Plug and Blow
Also known as the Valsalva Maneuver. Plug your nostrils with your fingers and blow through those nostrils. You should feel the pressure relieved from your sinuses.
This is the most common method and likely the one you learned during your open water courses. Although for some, the jaw shift, swallow, or a combo of all three may do the trick.
Most Importantly…
Equalize early and often to avoid discomfort and NEVER force it. If your ears won’t equalize, so be it. A missed dive is WAY better than a trip to the hospital.
READ MORE: How to Equalize Your Ears While Scuba Diving
8. Crucial Underwater Dive Skills
The amount of underwater skills necessary for successful scuba diving is extensive and far beyond what this post could encapsulate.
After all, there’s an entire class dedicated to them! It’s called open water scuba diving! I hope you remember most of them.
But this is a list of scuba diving refresher tips, so here’s the few we feel are absolutely necessary before hopping back into the water:
Mask Clearing
A mask full of water is the #1 reason a beginner scuba diver bolts to the surface (a deadly act). If your mask fills up, simply lean your head forward and blow out your nose as you lean your head back at the same time.
The air forced out your nostrils pushes the water out of the mask. Voila! You can see again!
Regulator Recovery
From time to time your regulator gets ripped out of your mouth. If this happens, don’t panic.
Make wide sweeps with your right arm starting at the bottom of your tank. As you sweep the hose should get caught on your arm, grab it, find the air source, and breathe.
Crisis averted.
Neutral Buoyancy
One skill that often gets overlooked during a refresher is neutral buoyancy. It’s an important thing (think streamlined, damage to coral or equipment, lower air consumption, etc).
When you reached your desired depth, give your BCD a few puffs of air. Take a deep breathe in and you should rise every so slightly. Now breathe out – you should descend. If you don’t, adjust the amount of air in your BCD (or your weight) accordingly.
Out of Air
Make a clear shoulder to shoulder hand slash over your throat. Your buddy will make a clear move to give you their alternate air source.
Link arms and head to the surface at a slow and safe rate.
Ascent Rate
Speaking of ascending, a safe and slow ascent rate is one foot per second while breathing at a normal pace. Remember, never hold your breath!
9. Safety Stop
Which leads us to our next point in scuba diving refresher tips: the safety stop. Most dive agencies recommend a safety stop after every dive.
What is a safety stop?
As you go along your dive and breathe the compressed air, a certain amount of nitrogen is accumulated in the bloodstream. Now, that’s no big deal down below but up on the surface it may give you some issues, particularly decompression sickness (DCS).
To avoid that, diver’s like to do a safety stop after every dive to ensure any built up nitrogen in their bloodstream is off-gassed at safe pressures.
How long should a safety stop be?
Most dive agencies recommend stopping between 15 – 20 feet (3 – 4 meters) for 3 to 5 minutes. The longer you stay, the more gas you offload.
READ MORE: 9 Fun Things to Do On Your Safety Stop
10. Take a PADI Refresher Course!
As thorough as we made this guide, it does NOT substitute real-life experience. The best scuba diving refresher tip of all is to go out and live it! (Under professional supervision, of course!)
That’s why we recommend taking PADI’s very own Refresher Course! It’s a fun and safe way to get your feet wet again. Dive professionals can personalize the experience specifically to your needs, add in a pool session, and thoroughly go over everything we discussed in this post and more!
Take a Refresher Course With Us!
And if that sounds good, consider doing it with us! We’d love to take you out and show you our favorite dive sites (after getting you back up to diving par).
We’re two dive professionals who’ve been going at the whole scuba thing for quite some time. We’d love for you to get back in the water with us!
Can’t wait to hear from you!

More Scuba Skills to Become a Better Diver
The buck doesn’t stop here. Check out our latest posts on how you can step up your dive game.

A Scuba Diver’s Guide to Tipping (How to Tip Your Dive Crew Accordingly)
13 Tips for New Scuba Divers on Your First Boat Dive
17 Useful Tips for Better Underwater GoPro Videos – Scuba Diving
How to Equalize While Scuba Diving
4 Easiest Methods of Water Entry in Scuba Diving

5 Best Scuba Diving Log Books in 2021
Enjoy this Post? Pin it!


Read More Scuba Diving Tips
We hope you enjoyed our post about scuba diving refresher tips. Hopefully, you’ll find it useful on your next adventure! Here are a few more ocean-loving articles we think you should read next:
- A Scuba Diver’s Guide to Tipping (How to Tip Your Dive Crew Accordingly)
- 13 Tips for New Scuba Divers on Your First Boat Dive
- 17 Useful Tips for Better Underwater GoPro Videos – Scuba Diving
- How to Equalize While Scuba Diving
What other questions do you have? What else could we add to our scuba diving refresher? Let us know in a comment below!


Thank you for sharing such a wonderful blog. I like the way how you describe each part of this blog. Your blog is very helpful for a person, who is a beginner in the scuba diving field, your blog will help them to knows about Scuba certifications. Keep sharing such informative stuff!!
Thank you for the comment, I’m glad you found it useful! We’ll be sure to look ya’ll up when we make our way over to Bali in the future!
Andrew
Very helpful information. I’ll definitely try to apply it myself.